• v2.3
    • Versions
    • master
    • v3.0
    • v2.3
    • v2.2
    • v2.1
    • v2.0
    • v1.7
    • v1.6
    • v1.5
    • v1.4
    • v1.3
    • v1.2
    • v1.1
    • v1.0


  • Install Akeneo PIM
    • Install Akeneo PIM with Docker
    • Install Akeneo PIM manually
      • System Requirements
      • System installation on Debian 9 (Stretch)
      • System installation on Ubuntu 16.04 (Xenial Xerus)
      • Installing Akeneo PIM Community Edition (CE) with the Archive
      • Installing Akeneo PIM Enterprise Edition (EE) with the Archive
      • Setting up the job queue daemon
    • How to customize the Dataset
    • How to Add Translation Packs
  • Migrate Akeneo PIM projects
  • Import and Export data
    • How import works
    • Understanding the Product Import
    • Understanding the Product Export
    • Formats
      • Localized labels
      • Scopable labels
      • Association types data structure
      • Attribute data structure
      • Category data structure
      • Family data structure
      • Family variant data structure
      • Group data structure
      • Options data structure
      • Product data structure
      • Product model data structure
    • Akeneo Connectors
    • How to Customize Import / Export
      • How to create a new Connector
      • How to import Products from a XML file
      • How to clean a CSV file during a Product import
      • How to automate imports/exports
  • Manipulate the Akeneo PIM data
    • How to Customize Mass Edit Operations
      • How to register a new bulk action
      • How to Register a New Mass Edit Action on Products
      • How to Avoid Rules Execution on Mass Edit Actions
    • How to Manipulate Products
      • How to Query Products
      • How to Create Products
      • How to Update Products
      • How to Validate Products
      • How to Save Products
      • How to Remove Products
    • How to Manipulate Non-Product Objects
      • How to Query Non-Product Objects
      • How to Create Non-Product Objects
      • How to Update Non-Product Objects
      • How to Validate Non-Product Objects
      • How to Save Non-Product Objects
      • How to Remove Non-Product Objects
    • How to add a custom action rule
      • General information about rule format
      • How to add a custom action in the rule engine
    • How to Define Access Control List
    • How to Customize the Catalog Structure
      • How to Create a Reference Data
      • How to add a custom unit of measure
      • How to Add New Properties to a Category
    • How to Customize Product Assets
      • How to Add a New Transformation
      • How to Add a Default Thumbnail For Unknown File Types
      • How to connect to an external server for storage
      • How to change the validation rule to match a reference file to an asset
      • How to Mass Import Assets
    • How To Customize Teamwork Assistant (Enterprise Edition)
      • Customize notifications
      • Add a calculation step
      • How to log calculation step
      • Remove projects impacted by a custom catalog update
  • Design the user interfaces
    • How to customize any frontend part of the application
    • How to add an action button or meta data to the product edit form
    • How to add a tab to a form
    • How to add a new tab in System / Configuration
    • How to add custom information to a field
    • How to add a new field type
    • Create a custom product export builder filter
    • How to create the UI to manage a Reference Data
    • How to add a new page
    • How to customize the main menu
    • Styleguide
  • Maintain Akeneo PIM projects
    • First aid kit
    • Bug qualification
    • Common issues
    • Scalability Guide
      • Audit with 3 Representative Catalogs
      • More than 10k attributes?
      • More than 10k families?
      • More than 10k categories?
      • More than 500 attributes usable in the product grids?
      • More than 100k products to export?
      • More than 1GB of product media to export?
    • How to purge history
      • How to Purge jobs executions
      • How to adapt the version purger to your needs
  • Contribute to Akeneo PIM
    • How to report an issue?
    • How to translate the user interface?
    • How to enhance the documentation?
    • How to contribute to a Connector?
    • How to submit a patch to the PIM?
    • How to contribute to the frontend part of the application
    • How behavior tests are architectured in the PIM?
      • Establishing Decorator Pattern
      • Using Spin In Behat
  • Technical overview
    • Product Information
    • Teamwork Assistant (Enterprise Edition)
      • Project creation
      • Project completeness
      • Project Completeness widget
      • Catalog update impact
      • Scalability guide
      • Users permission summary for Behat tests
    • Collaborative workflow
      • Simple workflow
      • Partial workflow
  • Technical architecture
    • Best Practices
      • Create a project
      • Create a reusable bundle
      • Setup Behat
      • Code Conventions
      • Coding Standards
    • Bundles
    • Components
    • How to implement your business logic using the event system
    • Events
      • Storage events
      • Workflow events (Enterprise Edition only)
    • How to Localize your data
      • How to change the PIM locale
      • How to Use Localizers
      • How to use Presenters
    • How to Add a Notification
    • Performances Guide
      • Memory usage of rules execution (Enterprise Edition)
      • Memory leak fix in Rules Engine (ORM)
      • More than 100 WYSIWYG editors in a page
      • PHP7 and HHVM Compatibility?
      • Job product batch size
    • How to Use the Web REST API
    • Standard format
      • Products
      • Other entities
      • Usage
    • Application Technical Information
      • Application Technical Dependencies
      • Server side set up for hosting
      • System Requirements
      • Recommended configuration
      • Client side configuration and compatibilities
      • Operation processes
      • Flow Matrix
  • Akeneo Cloud Edition
    • Flexibility Mode
      • Overview
      • Partners Starterkit
      • Environments Access
      • Composer settings
      • Periodic tasks / Crontab settings
      • PIM Application
      • PIM Updates and Migrations
      • Data File Transfer
      • Backups management
      • Partners
      • System Components
    • Serenity Mode
      • Overview
      • PIM Updates and Migrations
  • Akeneo Onboarder
    • Prerequisites
    • Installation
    • Synchronization
    • Environment variables
      • Using the DotEnv file
      • Using environment variables

How to Add a New Transformation

Quick Overview

This cookbook is about a feature only provided in the Enterprise Edition.

Transformations are classes which allow to transform a file from state A to state B. For example, in the Product Asset specific case, they transform a file coming from a Reference (A) to a Variation file (B). Each Variation is a transformation of a Reference.

Php5-gd is used in Akeneo PIM but you can add you own library to transform your file. The supported file formats are jpg, png and gif.

As Transformations are not specific PIM elements, they are located in \Akeneo and not \PimEnterprise. Then, you can find in Akeneo\Component\FileTransformer all business code and in Akeneo\Bundle\FileTransformerBundle all Symfony2 specific implementation.

Transformation runs with the registry pattern. You have to create your own Transformation implementing Akeneo\Component\FileTransformer\Transformation\TransformationInterface and register the service with the akeneo_file_transformer.transformation tag. Then, compiler pass will inject your tagged Transformation in the registry which will make it available.

Note

Learn more about registry pattern.

This cookbook assumes that you already created a new bundle to add your new Transformation. Let’s assume its namespace is Acme\CustomBundle.

Create a New Transformation

For the need of the cookbook, we’ll add a watermark transformation.

Note

To learn more about this transformation you can read the ImageMagick watermark documentation.

In order to create your transformation, you have to follow these rules:

  • your transformation has to implement Akeneo\Component\FileTransformer\Transformation\TransformationInterface.
  • your transformation must have a unique name.
  • your transformation service must be tagged akeneo_file_transformer.transformation.
# /src/Acme/Bundle/CustomBundle/FileTransformer/Transformation/Image/Watermark.php
<?php

namespace Acme\CustomBundle\FileTransformer\Transformation\Image;

use Akeneo\Component\FileTransformer\Options\TransformationOptionsResolverInterface;
use Akeneo\Component\FileTransformer\Transformation\AbstractTransformation;

/**
 * Watermark transformation
 */
class Watermark extends AbstractTransformation
{
    /** @var ImageMagickLauncher */
    protected $launcher;

    /**
     * @param TransformationOptionsResolverInterface $optionsResolver
     * @param ImageMagickLauncher                    $launcher
     * @param array                                  $supportedMimeTypes
     */
    public function __construct(
        TransformationOptionsResolverInterface $optionsResolver,
        ImageMagickLauncher $launcher,
        array $supportedMimeTypes = ['image/jpeg', 'image/png']
    ) {
        $this->optionsResolver    = $optionsResolver;
        $this->supportedMimeTypes = $supportedMimeTypes;
        $this->launcher           = $launcher;
    }

    /**
     * $options = [
     *      'font'      => 'Arial'   by default
     *      'size'      => '12'      by default
     *      'watermark' => 'my mark' what you want to write in watermark
     * ];
     *
     * {@inheritdoc}
     */
    public function transform(\SplFileInfo $file, array $options = [])
    {
        $options  = $this->optionsResolver->resolve($options);

        $fontPart = '-font ' . $options['font'];
        $sizePart = '-pointsize ' . $options['size'];
        $blackWatermarkPart = 'fill black text ' . $options['position'] . ' \'' . $options['watermark'] . '\'';
        $whiteWatermarkPart = 'fill white text ' . $options['position'] . ' \'' . $options['watermark'] . '\'';
        $drawPart = '-draw "gravity south ' . $blackWatermarkPart . ' ' . $whiteWatermarkPart . '"';
        $cmd = $fontPart . ' ' . $sizePart . ' ' . $drawPart;

        $this->launcher->convert($cmd, $file->getPathname());
    }

    /**
     * {@inheritdoc}
     */
    public function getName()
    {
        return 'watermark';
    }
}

Note

To see how the imagemagick command is launched, you can take a look at the Akeneo\Component\FileTransformer\Transformation\Image\ImageMagickLauncher class.

In order to rely on options you can add an OptionsResolver, for this you need to follow this rule:

  • your OptionsResolver must implement the Akeneo\Component\FileTransformer\Options\TransformationOptionsResolverInterface.
#/src/Acme/Bundle/CustomBundle/FileTransformer/Options/Image/WatermarkOptionsResolver.php
<?php

namespace Acme\CustomBundle\FileTransformer\Options\Image;

use Akeneo\Component\FileTransformer\Exception\InvalidOptionsTransformationException;
use Akeneo\Component\FileTransformer\Options\TransformationOptionsResolverInterface;
use Symfony\Component\OptionsResolver\OptionsResolver;

/**
 * Watermark Options Resolver
 */
class WatermarkOptionsResolver implements TransformationOptionsResolverInterface
{
    /** @var OptionsResolver */
    protected $resolver;

    public function __construct()
    {
        $this->resolver = new OptionsResolver();
        $this->resolver->setRequired([
            'font',
            'size',
            'watermark',
            'positionBlack',
            'positionWhite',
        ]);
        $this->resolver->setAllowedTypes([
            'font'          => 'string',
            'size'          => 'string',
            'watermark'     => 'string',
            'positionBlack' => 'string',
            'positionWhite' => 'string',
        ]);
        $this->resolver->setDefaults([
            'font'          => 'Arial',
            'size'          => '12',
            'watermark'     => 'Copyright',
            'positionBlack' => '0,45',
            'positionWhite' => '1,43',
        ]);
    }

    /**
     * {@inheritdoc}
     */
    public function resolve(array $options)
    {
        try {
            $options = $this->resolver->resolve($options);
        } catch (\Exception $e) {
            throw InvalidOptionsTransformationException::general($e, 'watermark');
        }

        return $options;
    }
}

Note

You can learn more about this Symfony2 component in the OptionsResolver documentation.

Next step is to create corresponding services in a dedicated file services.yml:

# src/Acme/Bundle/CustomBundle/FileTransformerBundle/Resources/config/services.yml
parameters:
    akeneo_file_transformer.options.image.watermark.class:        Acme\CustomBundle\FileTransformer\Options\Image\WatermarkOptionsResolver
    akeneo_file_transformer.transformation.image.watermark.class: Acme\CustomBundle\FileTransformer\Transformation\Image\Watermark

services:
    akeneo_file_transformer.options.image.watermark:
        class: '%akeneo_file_transformer.options.image.watermark.class%'

    akeneo_file_transformer.transformation.image.watermark:
        class: '%akeneo_file_transformer.transformation.image.watermark.class%'
        arguments:
            - '@akeneo_file_transformer.options.image.watermark'
            - '@akeneo_file_transformer.transformation.image.image_magick_launcher'
        tags:
            - { name: akeneo_file_transformer.transformation, alias: transformation_watermark }

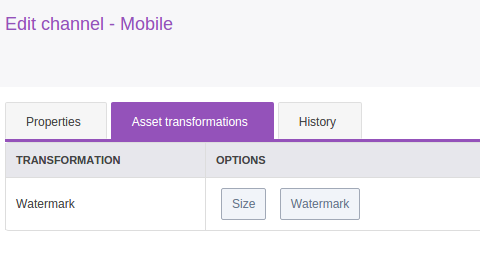
Translate Asset Transformation Details for Channels

A translation key is automatically created with the Watermark->getName(). You can translate it in a dedicated translation file:

# src/Acme/Bundle/CustomBundle/Resources/translations/messages.en.yml

pimee_enrich.asset_transformation.watermark.title: Watermark
pimee_enrich.asset_transformation.watermark.options.size: Size
pimee_enrich.asset_transformation.watermark.options.watermark: Watermark
[...]
../../_images/cookbook_transformation_channel_configuration.png

Add a Channel Configuration to Use the New Transformation

Adding a channel configuration for Reference transformation is a simple YML import:

asset_channel_configurations:
     mobile:
          configuration:
              watermark:
                 size: 15
                 watermark: "Copyright Akeneo"

Once you created your YML file you can go to Akeneo PIM and then start importing with the asset channel configuration import in yml profile.

Be careful, if you import only the new channel configuration file, all your previous configurations will be removed. You need to add your old configuration(s) in the file to keep it.

Now try to create an asset and generate variations for your channel. Download the generated file and discover your watermark:

../../_images/logo_watermark.png

Found a typo or a hole in the documentation and feel like contributing?
Join us on Github!